You pull your kayak up on the shore after a long day on the water. The sun is out, there is a light breeze, and you think to yourself, “It can’t get better than this.”
You open your front hatch, and notice a little water inside the hull. Immediately, your mind goes to the worst possible place. “I must have a gaping hole in my kayak.” you think to yourself. The sun seems to not seem as brightly, and all the fish in the world can’t stop that sinking feeling from setting into your heart.
What now?
Well, rest assured, you are in good hands. The sun will come out again. You will be back on the water in no time. And your kayak will be just fine.
Because your kayak is made of plastic, it is not indestructible. This is true of every kayak brand. But the fact that your kayak is made out of plastic is actually a huge advantage over a $10,000 plus bass boat. Plastic is very easy to fix. Instead of taking your boat to a shop and paying thousands to repair the hull, you can repair just about anything that goes wrong with your kayak in your garage with just some simple tools that cost less than $20. My hope is that this blog will help you feel confident fixing any damage that may happen on the water or off.
How much water in the hull is too much?
This is a question that you need to answer for yourself. Because the hull of your kayak isn’t an airtight seal, some water is bound to make its way into the hull. This may be a drop or two, or it may be a few cups. Whitewater and offshore paddling will always let more water in than fishing still water. However, if you find more than a couple cups of water inside the hull especially if paddling still waters, it may be time to do some exploring.
Finding the problem
The first step in repairing your kayak is determining where the water is getting into the hull. Start by getting your kayak off the ground. This may be in the bed of a truck, on a trailer, or on some simple supports. Be sure to support the front, back, and middle of the kayak.
Begin by filling the hull with water. You can do this through a front hatch if you have one, or through the drain plug. Fill it so that the water level inside is higher than the level of the standing platform. Wait a few minutes, and check the ground around the kayak for drips. This would indicate a crack in the outside of the hull. Inspect the scupper holes. Run your fingers around the inside of each one and feel for cracks.
If there is no water leaking out on the exterior of the kayak, inspect the standing platform. Is any water beginning to pool up inside? This would indicate a crack on the deck of the kayak.

Some Feelfree kayaks have a removable standing platform. Removing the screws that hold it in place will allow you to inspect under the platform for damage. It is not advised that you remove the platform unless you see water pooling up when filling the hull with water. Doing so may lead to additional damage to your kayak.
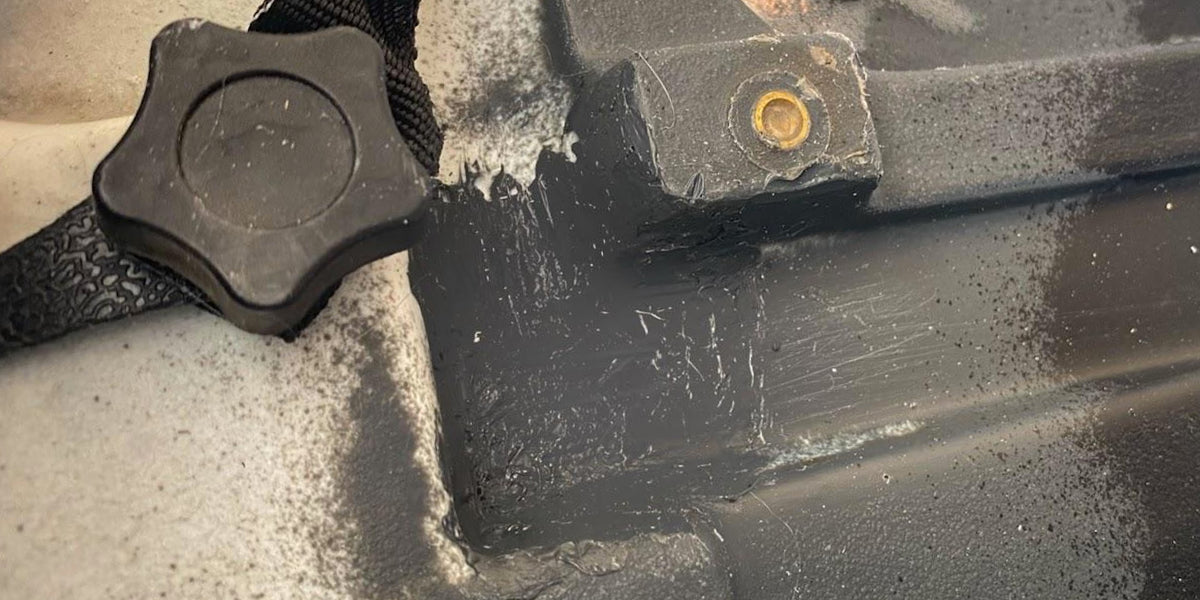
Once you find the crack, you'll need to determine what type of repair you will need. If the crack is small or a hairline fracture such as the one pictured above, the repair process should be fairly easy. If you see a large open gap, or if the crack is longer than a few inches, please contact your local dealer for assistance.
Step 1. You want to start by contacting your local Feelfree dealer, or Feelfree customer service for some plastic welding rods that match the color of your kayak. If you are unsure of the color, the serial number on the hull should provide Feelfree the information they need. Not all plastics are the same so be sure to use welding rods for proper bonding.
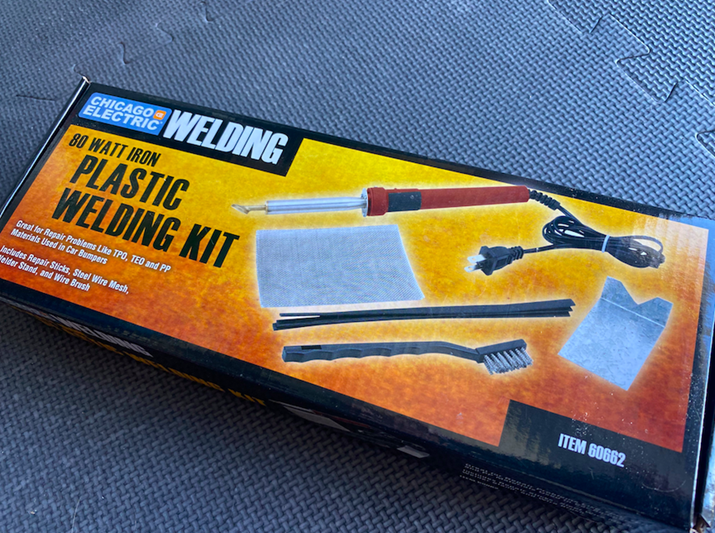
Step 2. Purchase a Plastic Welding Kit. The kit pictured below works great and can be purchased from Harbor Freight for less than $20.

Step 3. Use a 1/16th drill bit to drill a small hole on each end of the crack you found. This will prevent the crack from spreading in the future.
Step 4. Scrub clean the area thoroughly and make sure it is dry.
Step 5. Use a small knife or blade to bevel the crack. Just trim a small amount of material off the top edge of each side of the crack. This should create a small channel to apply the new material. Only trim off the top edge. Do not take off so much material that it opens up a hole in the hull.
Step 6. Heat the welding iron to maximum temperature.
Step 7. Using the tip of the welding iron, gently heat the channel. You do not want it to melt at all, you simply want it to heat up so that the welding rod fuses with the kayak hull.
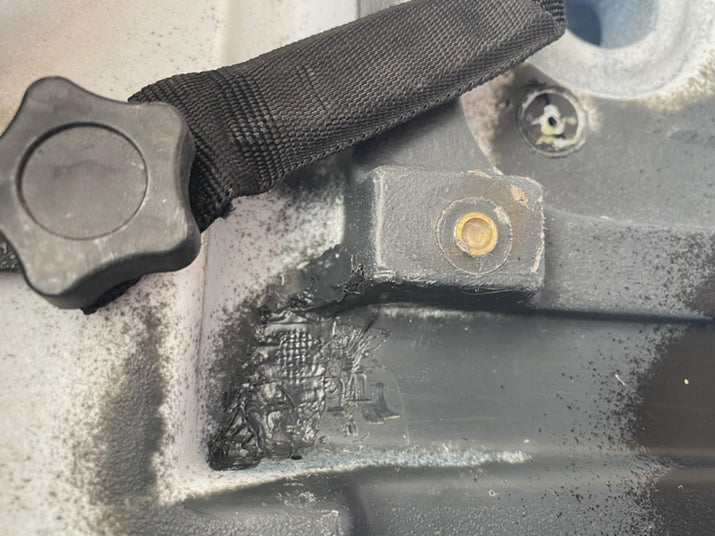
Step 8. While the crack is warm, use the welding iron to gently melt the welding rod into the crack. This will take some finesse (use the same finesse that you use with your finesse fishing). Just go slow and be gentle. Do not press hard or hold the welding iron on the hull for too long. Most welding kits will provide instructions with specific techniques based on the iron you purchased.
Step 9. Once the crack is filled with new material, use the welding rod to cross hatch the area. Make small x marks along the repair where the crack used to be.

Step 10. If the crack was in a high stress area such as where a seat sits, or on a handle, consider using the following steps to help reinforce the area.
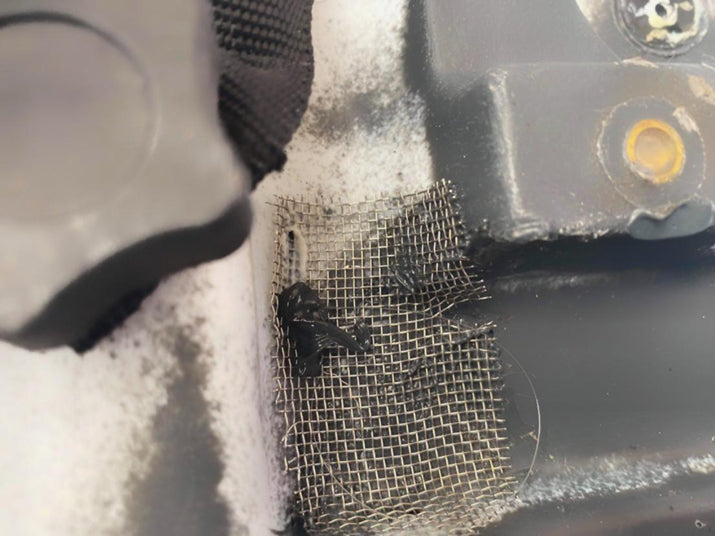
Step 11. Cut a piece of wire mesh to fit the area that was repaired. (Mesh is included in the Harbor Freight kit)
Step 12. Press the mesh into the repaired area.

Step 13. Using the welding iron, gently heat the mesh until it begins to bond with the plastic of the hull. Once the mesh has bonded with the hull, use another welding rod to weld over the mesh. This may take some time as you want to, again, keep the mesh and hull warm as you apply the new material to the top.
Step 14. Once you are finished with the repair, simply use a piece of light grit sandpaper to smooth the plastic. If you used mesh, be sure not to expose any of the mesh during the sanding process. You do not want anything to snag on the mesh and redamage your kayak.

Step 15. When you are finished, test the repaired area on land with water like before. Either fill the hull with water, or fill the deck with water, and see if the repaired area holds well. If it all seems okay, continue testing in a controlled area such as a small shallow lake or pond where you can easily stand up and haul the kayak safely to the shoreline.
If everything holds up well, consider yourself a certified kayak repair person. Congratulations! You did it! Treat yourself to a beverage and some serious time on the water.
Written and edited by Bobby Ulrich, Feelfree US Pro Staff Team Member
